1. How to Clip a Video into Segments?
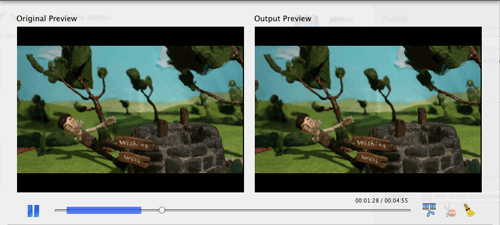
- 1. Choose the video file you want to clip. Then click "Edit Effect" icon
 , and in the popup box, the video will be played automatically.
- 2. When the video is playing, click "Start" icon
 to clip the video based on time by blue marker.
- Note: When the video is paused, it doesn't support clip.
- 3. And then click the available "End" icon
 to complete the clip.
- Tips:
- (1) When click "Clear" icon
 , the blue marked clip will be deleted from playback progress bar.
- (2) You can restart clip the video by click "Start" icon when a clip completed. And the prior one will be removed.
Brief introduction of the "Video Clipping" Window:
2. How to Merge Files into One?
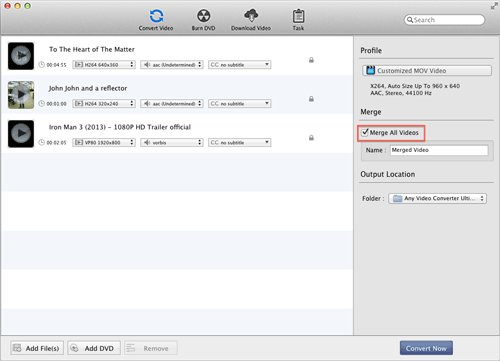
- 1. Add all the files you want to merge to the program.
- 2. Click the required profile in “Profile” drop list on the main interface.
- 3. Check on "Merge all video" and click "Convert Now!" button, you can merge multiple files into one.
- Tips:
- 1. One file does not support to merge.
- 2. The videos of merge video can freely add, delete, sort and preview.
- 3. The videos of merge video can’t custom profile separately.
- 4. The merge video doesn't support edit video.
3. How to Crop Video Size?
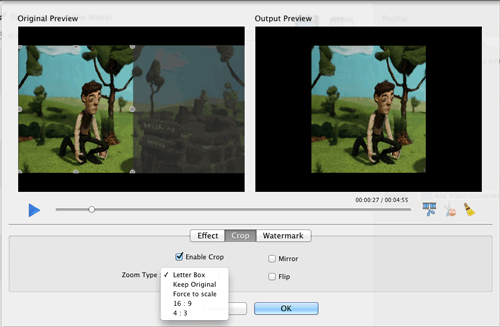
- 1. After adding the file, click "Edit Effect" icon
 , and in the popup box, please shift to "Crop" tab.
- 2. Check on "Enable Crop" and then the crop frame will show up in the "Original Preview" window. The Output Preview will display the pictures from viewfinder.
- 3. When Checking on "Enable Crop", click the drop-list to set the "Zoom Type" such as Letter Box, Keep Original, Force Scale, 16:9 and 4:3.
4. How to Flip or Mirror Video?
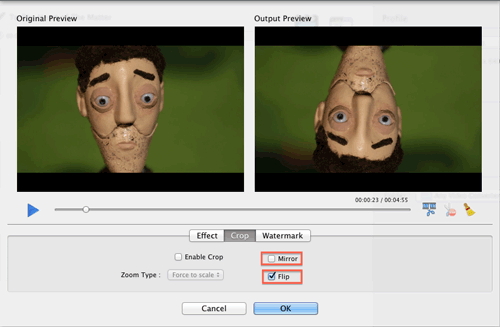
- 1. Choose the video file you want to flip or mirror. Click "Edit Effect" icon
 , and in the popup box, please shift to "Crop" tab.
- 2. Under Crop tab, you can check on "Flip" or "Mirror" to flip or mirror video. The Output Preview will display the pictures from viewfinder.
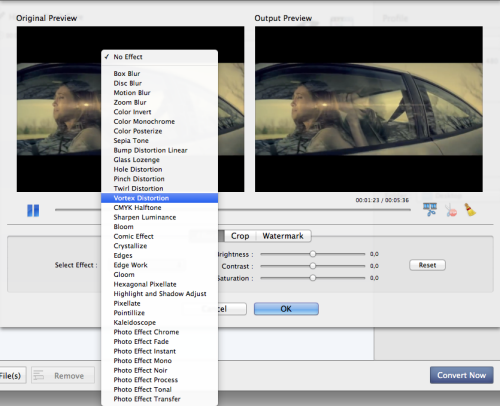
5. How to Apply Special Effects?
- 1. After adding the file, click "Edit Effect" icon
 , and in the popup box, please shift to "Effect" tab.
- 2. Under the tab, "Select effect" drop-list to set No Effect or add the effect such as Blur on the video.
- 3. Drag the value sliders to adjust Brightness, Contrast and Saturation.
- Tips: You can click "Reset" button to cancel the Effect settings on the video.
6. How to Add Watermark on Video?
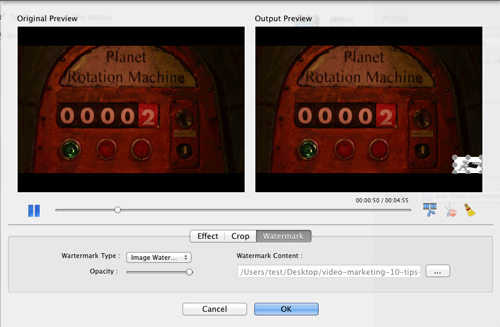
- 1. Choose the file you want to add watermark, click "Edit Effect" icon
 , and in the popup box, please shift to "Watermark" tab.
- 2. Under the tab, Click Watermark Type drop-list to set No Watermark or set watermark with Image Watermark or Text Watermark.
- 3. Set Image Watermark: Click the available … button to add Watermark Content and then drag the available slides to adjust Opacity.
- 4.Set Text Watermark: Input the text in the Watermark Content and click the available … button to set the font. Then drag the available slides to adjust Opacity.
- Tips:
- (1) You can drag and resize the watermark in the Output Preview window.
- (2) Changing the Watermark Type will remove the watermark that has been added.
7. How to Save A Frame?
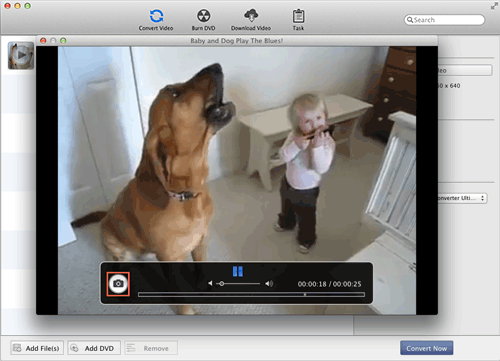
- 1. Click the play button at artwork of each file to let you preview the video. Then a preview window pops up.
- Tips: At the bottom of the window, a menu bar with play button, sound button, screenshot button, progress bar and time parameters can help you preview video better.
- 2. Click the screenshot button on the menu bar, then a frame from the video will be saved to the default path "/ Users/ user/ Pictures/ Any Video Converter Pro" with ".png" format.
- Note:
- (1) All effects produced from Effect, Crop and Watermark will be both displayed in the Output Preview window.
- (2) Changing the Clip, Effect, Crop and Watermark is independent with each other.


